How to Allow an Application (b.VPN) through Windows Firewall
Most of the programs are blocked right out of the box by Windows Firewall to help secure your computer and protect it from intrusion. To work properly, some programs might need to be allowed to work through the firewall.
The steps you need to make to allow an application through Windows Firewall:
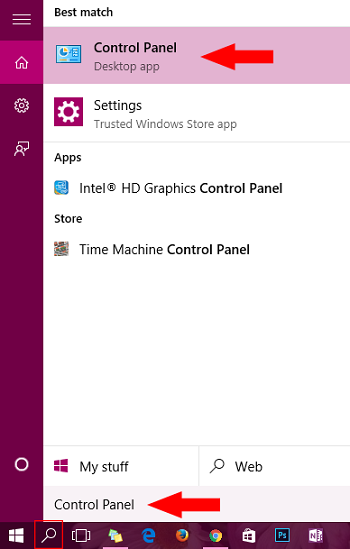
Click on search icon in the task bar, type “Control Panel” and click on the first search result.
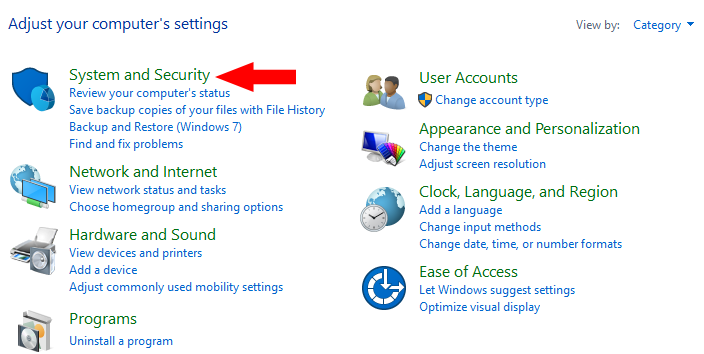
Select “System and Security”.
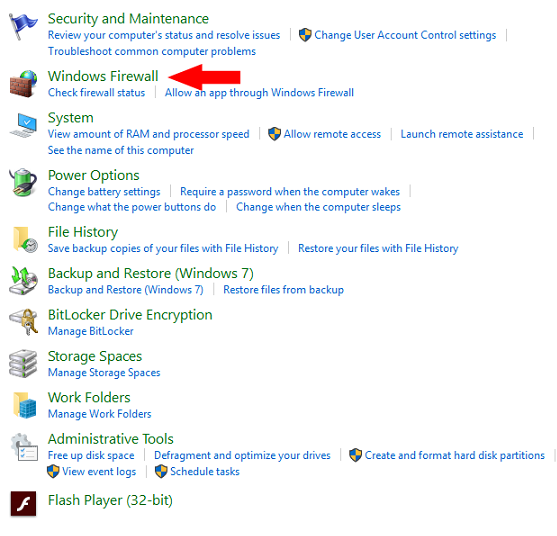
Click “Windows Firewall”.
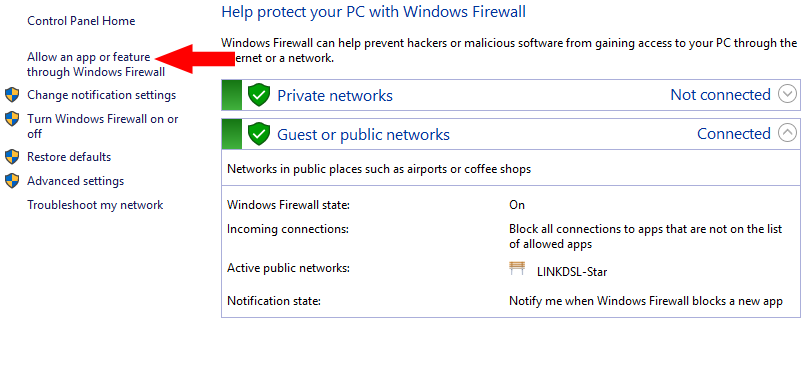
From the menu on the right, choose “Allow an app or a feature through Windows Firewall”.
Choose “Change settings”. If you are asked for the administrator password, insert it to continue.
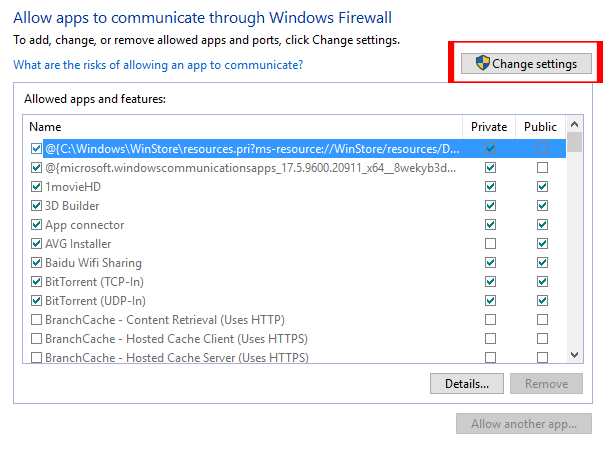
Choose the box next to the name of the program you want to allow through the firewall.
Don’t forget to select Private or Public or select both for the network on which the program is operating.
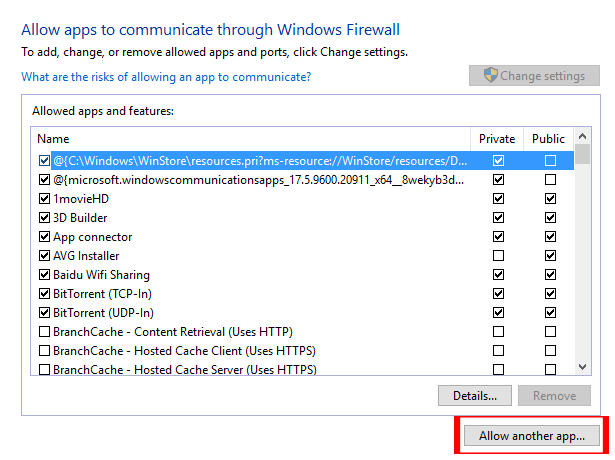
If the program name is not on the list, select “Allow another app” and search for it.
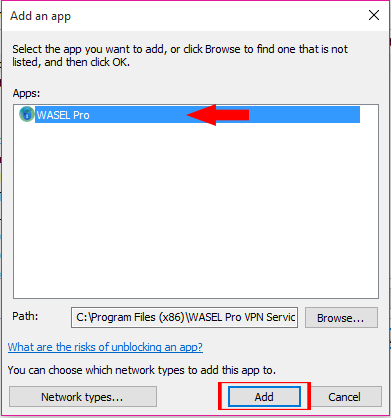
When you find the app or program you want, choose it and press “Add”.
For the apps that communicate on a custom port, that port should be opened through Windows Firewall as well.
This can be done by selecting “Advanced settings”, after going back to Firewall from Control Panel.
Then you have to select “New Rule” after right clicking on the Inbound and/or Outbound rules.
Two rules will be needed to be created on both directions, if the app is communicating in both directions.
To continue you have to select the rule option.
You have to designate the port that the app will be communicating on and also the protocol.
Create one for the two protocols, if you can't make sure of the protocol.
At last, you should go through with the wizard and select “Finish”.